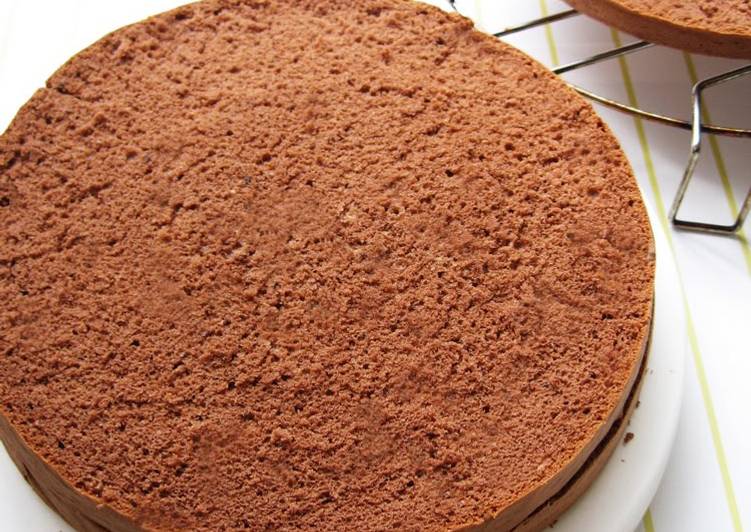
Hello everybody, it’s Brad, welcome to our recipe site. Today, I’m gonna show you how to make a distinctive dish, light and moist chocolate sponge cake. One of my favorites. For mine, I’m gonna make it a bit unique. This is gonna smell and look delicious.
Light and Moist Chocolate Sponge Cake is one of the most popular of current trending meals on earth. It is easy, it’s quick, it tastes yummy. It is appreciated by millions every day. They are nice and they look wonderful. Light and Moist Chocolate Sponge Cake is something which I have loved my whole life.
To get started with this particular recipe, we must prepare a few components. You can have light and moist chocolate sponge cake using 7 ingredients and 28 steps. Here is how you can achieve it.
The ingredients needed to make Light and Moist Chocolate Sponge Cake:
- Make ready 3 Egg whites (large)
- Get 120 grams Granulated sugar
- Take 3 Egg yolks (large)
- Prepare 80 grams Cake flour
- Prepare 50 ml Milk
- Prepare 30 grams Butter (or margarine)
- Get 20 grams Cocoa powder
Instructions to make Light and Moist Chocolate Sponge Cake:
- About the ingredients: I recommend using large eggs. Refrigerate until use. You can substitute margarine for baking for the butter. Preliminaries: Line the mold with parchment paper. If the paper curls up, oil the cake tin before putting in the paper and it will stick to the oil.
- Put egg whites in a bowl, and whip with a handheld mixer. (Make sure that you use an impeccably clean bowl. If it has any water or oil in it, the egg whites won't whip up properly!)
- When the egg whites are whipped to an even, smooth consistency, add 1/2 of the granulated sugar and whip together. When it's very fluffy add the rest of the sugar, and keep whipping until it turns into a smooth, shiny meringue.
- If stiff peaks form when you lift the mixer, it's done! (It's a must to make a meringue that forms peaks!)
- Add the yolks to the meringue and mix well. (When the yolks are evenly incorporated, it's done.)
- Sift the cake flour into the batter. Use a rubber spatula and mix up from the bottom using a cut-and-fold motion. It's easier if you turn the bowl with one hand as you mix! (Whatever you do, don't beat or knead the batter. Mix as little as possible.)
- Put the butter and milk into a heatproof bowl, cover with plastic wrap and microwave for a minute and a half. (You can also warm it in a small pan.)
- When the butter and milk are warm, sift in the cocoa powder and mix to dissolve. (It's a bother, but be sure to sift it!)
- Keep on mixing until the cocoa has completely dissolved! (Make sure there are no lumps!)
- Add the Step 9 mix to the Step 6 batter a little at a time. (If you add it all at once the cocoa butter will sink down to the bottom!) Mix the batter up from the bottom while turning the bowl with one hand, using a cutting motion and working quickly. (Be sure not to beat or knead it at this point too. Mix as little as possible.)
- Pour the batter into the lined mold. (Since the batter at the bottom of the bowl does not rise well, pour it around the perimeter of the mold, where it will cook faster.) Drop the filled cake pan 4 to 5 times at a height to eliminate air pockets, and smooth out the surface.
- Bake for 30 to 40 minutes in a preheated 340°F/170°C oven. If you poke the middle with a bamboo skewer and it comes out clean, it's done! As soon as it's baked, drop it at a height of 20-30 cm onto a work surface to prevent the cake from shrinking.
- Put a well wrung out moistened kitchen towel on your work surface, and take the spongecake out of the cake pan. Peel the paper off the sides. (Put the cake top upside down.)
- Put the cake pan back on the cake and leave for 2 to 3 minutes. (This is to make the top surface flat, and to even out the moisture in the cake.)
- Take the cake pan off and peel off the paper from the bottom.
- Turn the cake over and cool on a cake rack.
- Cover the spongecake with a moistened and tightly wrung out kitchen towel, and leave to cool.
- When the spongecake is cool, slice horizontally and fill and decorate as you like. (The cake is easier to slice if you let it rest for a day. Keep in a plastic bag.)
- How to slice the sponge cake cleanly: Mark the sides vertically with a knife so that you can re-stack the layers later.
- If you don't have a cake slicer: Insert toothpicks where you want to slice through the cake, starting with the upper layer, spacing the toothpicks evenly (in 4 to 8 places).
- Slice through the cake on top of the toothpicks horizontally. Slice the lower layer in the same way.
- Re-stack the layers, following the vertical marks you made in Step 19.
- Tip: If you flip the bottom layer over, put the middle layer on top, and the top layer in the middle, the cake will be easier to decorate.
- To make a 12 cm diameter cake: Re-calculate the amounts based on 1 egg. (I halve the amounts mixed for the 18 cm cake.) Bake for 25 to 30 minutes (28 minutes works best for my oven).
- To make a 15 cm diameter cake: Halve the amount of ingredients used for the 20 cm cake. Bake for 30 to 35 minutes (340°F/170°C, 34 minutes in a gas oven).
- To make a 21 cm diameter cake: Re-calculate the amounts based on 5 eggs (Or multiply the amounts for the 18 cm cake by 1.5.) Bake for 30 to 40 minutes (35 minutes works best).
- To make a 12 cm diameter cake plus a 15 cm diameter cake: Use the amount of ingredients specified for the 18 cm or 20 cm cakes (I prefer the latter). Baking times - 12 cm = 28 minutes, 15 cm = 34 minutes.
- When trying to figure out how much batter you need for a particular round or square mold, just keep in mind that you should have 1 egg for every 500 ml of batter poured inside the pan.
So that is going to wrap it up for this exceptional food light and moist chocolate sponge cake recipe. Thanks so much for reading. I’m confident you can make this at home. There is gonna be interesting food in home recipes coming up. Don’t forget to bookmark this page in your browser, and share it to your loved ones, colleague and friends. Thanks again for reading. Go on get cooking!